Can Food Coloring Affect Behavior? What the Research Says
Food coloring shows up in everything from cereal boxes to birthday cakes. But beyond adding color, there's a growing debate: can food coloring affect behavior, especially in children? Concerns have sparked parental caution, school policy changes, and even regulatory reviews across different countries. In this article, we dive into the science, myths, and ongoing discussion to uncover what the research really says about food coloring and its possible behavioral effects.
What is Food Coloring?
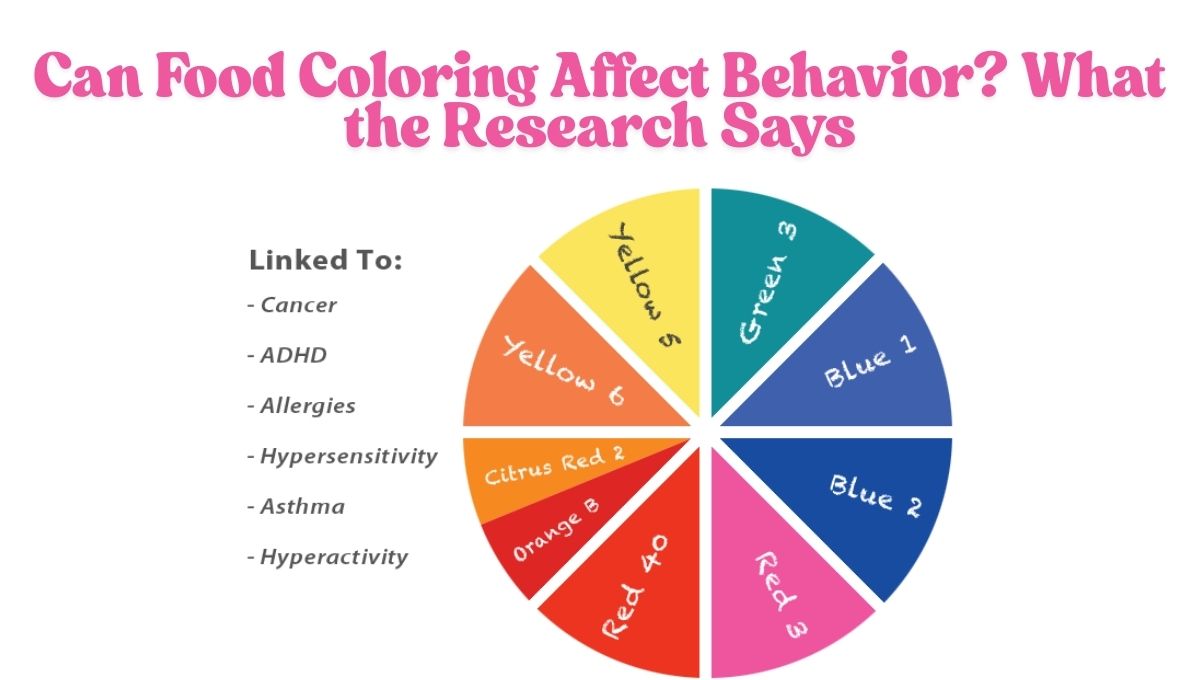
Food coloring refers to dyes, pigments, or substances added to food or drinks to enhance appearance. They come in synthetic forms (like Red 40, Yellow 5, and Blue 1) and natural alternatives (such as beet juice or turmeric extract). Synthetic colorants are widely used in processed foods due to their stability and low cost. While approved by the FDA and similar agencies worldwide, concerns have been raised about their impact on sensitive populations.
Historical Concern: Where It All Began
The question of whether food coloring affects behavior dates back to the 1970s. Pediatrician Dr. Benjamin Feingold proposed that artificial colors and flavors could trigger hyperactivity in some children. His Feingold Diet, which eliminated these substances, gained traction among parents desperate for answers. Though widely criticized for lacking solid data, Feingold's work sparked a series of studies into the behavioral impacts of food additives.
The Research Landscape: What Studies Reveal
Mixed Findings Across Studies
Several double-blind placebo-controlled studies have investigated the effects of synthetic food dyes on children’s behavior. A 2007 study by the University of Southampton found a small but measurable increase in hyperactivity among children consuming certain food dyes and preservatives. This led the European Union to require warning labels on foods containing those additives.
However, follow-up studies—especially in the U.S.—have yielded inconsistent results. The FDA reviewed the data and concluded that while some children may be sensitive to food coloring, the general population is not significantly affected.
ADHD and Food Coloring
A subset of children diagnosed with ADHD may show behavioral improvements when food dyes are eliminated. This doesn’t mean dyes cause ADHD, but they may act as aggravators in those already predisposed. A meta-analysis in "Pediatrics" reported that artificial colors may have a small but significant impact on children’s behavior, particularly in those with existing attention issues.
Natural vs. Artificial: Does It Matter?
There’s a general perception that natural food coloring is safer than artificial dyes. While natural colorants don’t contain synthetic chemicals, their safety isn't absolute. Some individuals may have allergies or sensitivities to natural substances too. However, when it comes to behavioral concerns, most of the research scrutiny has focused on synthetic dyes rather than natural alternatives.
Regulatory Stance: U.S. vs. Europe
The U.S. FDA allows the use of artificial colors but monitors them for safety. They require certification and proper labeling but stop short of requiring warning labels. In contrast, the European Union mandates warning statements on foods containing certain synthetic dyes, urging manufacturers to shift toward natural alternatives. This policy difference reflects varying interpretations of the same research data.
Parental Observations: Beyond the Science
Anecdotal evidence can be powerful. Many parents report seeing changes in mood, focus, or behavior after their children consume brightly colored foods. While not scientifically rigorous, these lived experiences often guide dietary choices more strongly than academic studies. In some cases, removing food dyes has made a noticeable difference in household dynamics.
Industry Response and Trends
With consumer demand shifting, many brands are reformulating products to include natural colorants or omit food coloring altogether. Major companies like Kraft and Nestlé have pledged to remove artificial dyes from children’s products. Organic brands rarely use synthetic dyes, aligning their products with growing health-conscious market trends.
FAQs
Is food coloring safe for everyone?
Food coloring is considered safe for the general population when used within regulatory limits. However, certain individuals—especially children with behavioral sensitivities—might react negatively.
Are natural food colorings better?
Natural food coloring avoids synthetic chemicals but may still cause reactions in sensitive individuals. They’re often preferred for their clean-label appeal.
Can food coloring cause hyperactivity?
Research shows that artificial food dyes may increase hyperactivity in a small subset of children, particularly those with ADHD or behavioral sensitivities.
Should parents eliminate food dyes from their children’s diet?
If you notice behavioral changes linked to specific foods, consider eliminating artificial dyes and monitor the effects. Consult a healthcare provider for personalized guidance.
Conclusion
So, can food coloring affect behavior? The answer isn’t black and white. For some children—especially those with behavioral sensitivities—synthetic food dyes may exacerbate symptoms like hyperactivity. While not harmful for the majority, growing evidence and changing public sentiment are encouraging a shift toward natural alternatives. If you're concerned, reviewing ingredient labels and opting for dye-free options can be a step toward peace of mind.
How to Support Mental Health in Athletes Effectively
The Hidden Struggles Behind the Spotlight
Athletes often appear invincible—physically strong, mentally tough, and relentlessly driven. Yet, beneath the surface, many grapple with significant mental health challenges. From performance anxiety and injury-related stress to post-career identity crises, the pressures are immense. Recent tragedies in professional sports, such as the suicides of former AFL players Adam and Troy Selwood, underscore the urgent need to address mental health in athletes.
This article explores effective strategies to support mental health in athletes, emphasizing the importance of proactive measures, open communication, and comprehensive support systems.
Understanding the Unique Mental Health Challenges Athletes Face
Performance, Pressure, and Perfectionism
Athletes are frequently subjected to enormous expectations from fans, coaches, and even themselves. This constant pressure can lead to perfectionist thinking and high anxiety. The drive to succeed and fear of failure can push athletes toward chronic stress, burnout, and mental fatigue. NBA player Tyrese Haliburton recently shared his experiences with anxiety and depression, revealing how external pressures and injuries took a toll on his well-being.
Injury and Recovery
Injuries not only affect an athlete’s physical capabilities but also their mental state. Recovery periods often involve isolation from the team, uncertainty about returning to form, and fear of re-injury. This can lead to depressive symptoms, feelings of helplessness, and reduced self-worth. Athletes may struggle silently during rehabilitation, making it vital to provide emotional and psychological support during these times.
Transitioning Out of Sports
Leaving the game—whether due to retirement or injury—can create a deep sense of loss. Many athletes tie their identity to their sport, and without it, they may feel aimless or unrecognized. The lack of purpose post-career is a critical time when athletes are particularly vulnerable to mental health issues. The AFL’s recent losses highlight the importance of supporting players during these transitions.
Key Strategies to Support Mental Health in Athletes
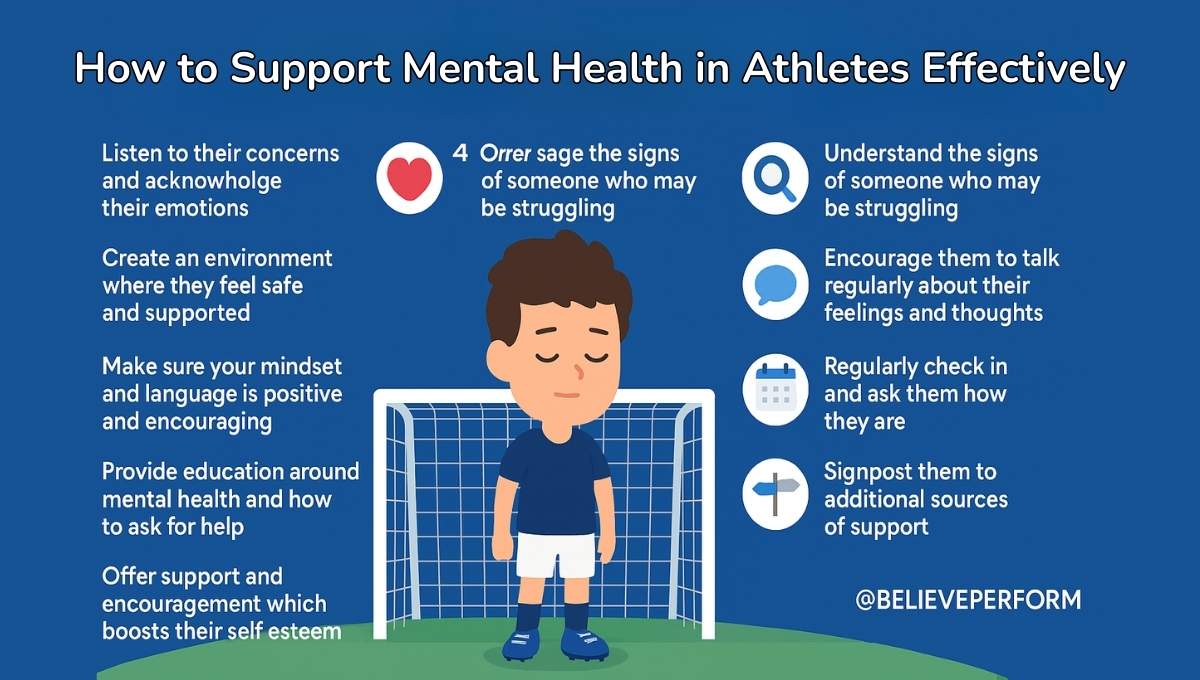
1. Foster Open Communication
A culture of open and honest dialogue is essential. When athletes feel safe to talk about their struggles, it becomes easier to identify early warning signs of mental health issues. Coaches and support staff should normalize discussions around mental health, actively listen without judgment, and respond with empathy. Encouraging vulnerability helps remove the stigma and creates a supportive team atmosphere.
2. Integrate Mental Health Education
Education plays a powerful role in prevention. By educating athletes about the signs and symptoms of common mental health challenges, teams can equip them with the tools to manage stress and seek help early. The NCAA provides educational resources to promote awareness and resilience among athletes. Workshops and talks by professionals can further reinforce these lessons.
3. Provide Access to Professional Support
Mental health professionals should be an integral part of every sports organization. Just as athletes receive regular physical check-ups, mental health support should be normalized and easily accessible. Resources like the U.S. Center for Mental Health & Sport offer specialized services and training to help athletes maintain psychological well-being.
4. Encourage Peer Support Programs
Peer-led initiatives can be incredibly powerful. Hearing from fellow athletes who have navigated mental health challenges helps others feel less alone. Programs like Athletes for Hope’s Whole Being Athlete initiative promote peer storytelling and mental health advocacy among athletes. These programs foster a sense of solidarity and mutual support.
5. Implement Mindfulness and Stress-Reduction Techniques
Mindfulness practices such as deep breathing, meditation, visualization, and positive self-talk have proven benefits in managing stress and improving focus. When incorporated into daily routines, these practices can enhance mental resilience and athletic performance. Sports bodies like the NFL actively promote such strategies among their athletes.
Traditional vs. Holistic Approaches to Mental Health in Sports
In traditional sports environments, the primary focus tends to be on physical performance, with limited consideration for mental health. Support systems are often minimal, and discussions about mental struggles may be discouraged or overlooked.
By contrast, a holistic approach values both physical and mental well-being. It involves a broader support network that includes psychologists, counselors, and peer mentors. Education is extended beyond tactical skills to encompass mental health awareness and coping strategies. This integrated model not only supports athletes in the present but also lays the foundation for long-term development, resilience, and life beyond sports.
FAQs
What are the common signs of mental health issues in athletes?
Signs include mood swings, withdrawal from teammates, sudden drops in performance, trouble sleeping, irritability, and loss of enthusiasm for the sport.
How can coaches support athletes' mental health?
Coaches can provide emotional support by fostering open dialogue, encouraging rest and recovery, and referring athletes to professional help when needed.
Are there specific programs for youth athletes?
Yes, programs such as UW Medicine’s Mentally Strong initiative equip coaches with the tools to support high school athletes' mental well-being.
How does mental health impact athletic performance?
Mental health directly affects focus, confidence, and motivation. Poor mental well-being can lead to fatigue, slower recovery times, and increased risk of injury, while strong mental health promotes resilience and better overall performance.
Conclusion: Prioritizing Mental Health in Athletes
Supporting mental health in athletes is not an optional add-on—it’s essential for their success and longevity, both on and off the field. When we prioritize open communication, access to care, mental health education, and peer support, we create a foundation where athletes can thrive holistically.
Let’s move beyond just celebrating physical victories. By championing mental health in athletes, we ensure they feel valued, supported, and equipped for every stage of their journey.
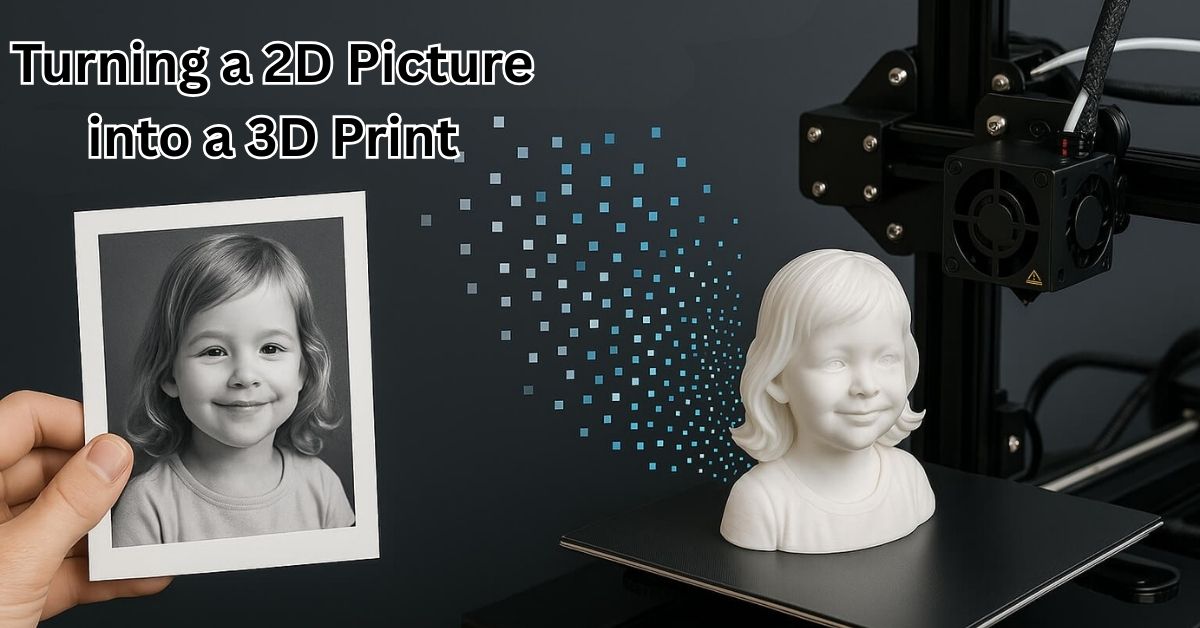
Create Stunning Keepsakes by Turning a 2D Picture into a 3D Print
A Simple Photo Can Do More Than You Think
Have you ever looked at an old photo and felt a wave of emotion wash over you? That memory, frozen in time, holds so much value. Now imagine holding that memory in your hands—not as a flat picture, but as a beautiful 3D keepsake. Thanks to evolving technology, turning a 2D picture into a 3D print is possible and surprisingly simple. This blog will guide you through the process, uncover fresh ideas, and show how this transformation can help preserve the most meaningful parts of your life. If you're exploring this for commercial use, choosing the best 3D printer for a small business can help you scale your creativity into a profitable venture.
From Pixels to Sculptures: How the Magic Happens
Turning a flat image into a 3D object might sound like a job for an artist. In reality, it’s a mix of smart software and precise machines. Here’s a breakdown:
Step 1: Choose the Right Photo
Not all photos work equally well. Clear images with good lighting and sharp contrast make better 3D models. For portraits, a front-facing headshot gives the best results.
Step 2: Convert with 3D Modeling Software
Several software options help convert 2D images into 3D models:
Smoothie-3D: Great for beginners. Free and web-based.
Lithophane Makers: These turn your image into a 3D light panel.
Blender: Advanced tool for detailed work.
You trace or map your image onto a 3D surface and adjust depth manually or let AI assist.
Step 3: Prepare for Printing
Once you have the model, slice it using tools like Cura or PrusaSlicer. Adjust resolution and supports depending on your printer type—FDM or resin.
Step 4: Print and Finish
Print your model using filament or resin. Post-processing might include sanding, priming, or painting, depending on your taste.
Real-Life Stories: Memories Brought to Life
Sarah’s Grandfather
Sarah lost her grandfather a year ago. She had one cherished photo of them fishing. Using a 3D modeling service, she turned the photo into a lithophane. When she puts it near her desk lamp, the image softly glows—a beautiful reminder of a quiet day on the lake.
Mark’s Wedding Gift
Mark wanted a unique anniversary gift. He turned a wedding photo into a miniature sculpture. His wife was speechless when she unwrapped it—a frozen moment now standing on their mantel.
These stories show how turning a 2D picture to 3D print can touch lives.
Why It’s More Than Just a Print
There’s something magical about holding a memory. Here’s why these keepsakes matter:
Emotional Connection
A 3D object feels more real than a flat photo. It invites touch. It adds depth—literally and emotionally.
Timeless Gifts
Unlike common photo frames, a custom 3D print is unexpected and personal. It becomes a conversation piece.
Digital to Physical Transition
In today’s digital age, so many moments stay trapped in phones. 3D printing brings them to life.
Choosing the Right Method for You
Not all projects are equal. Here’s a breakdown of methods and their uses:
Method | Best For | Tools Needed | Skill Level |
Lithophane | Glowing light panels | Lithophane generators | Beginner |
Relief Sculptures | Faces, logos, art pieces | Blender, ZBrush | Intermediate |
Full 3D Models | Busts, figures, small statues | Multiple software tools | Advanced |
Lithophane for Beginners
You upload a photo, adjust contrast and brightness, and print. They work well as night lights or sun catchers.
Sculpted Relief for Portraits
Relief gives a low-profile, raised effect like what you see on coins or medals.
Full Models for Serious Projects
Want a statue of your pet or a 3D family photo? These take more time but are incredibly rewarding.
Tools and Software You’ll Need
The market offers both free and premium tools. Here are some of the most reliable:
Smoothie-3D: Great for beginners.
Blender: Free, open-source. Has a learning curve but highly customizable.
Photoshop + Depth Map Tools: Good for grayscale reliefs.
PrusaSlicer / Cura: Essential for slicing models for print.
For those not tech-savvy, online services like ItsLitho, Shapify, or Zazzy can handle it for you.
Tips for Best Results
Choose high-resolution photos.
Adjust contrast before importing.
Use grayscale versions for lithophanes.
Test print a small version before the final.
Use a resin printer for detailed face models.
A Look Into the Future
Technology is improving fast. AI is already helping convert images into depth maps. Soon, you might upload a photo and instantly receive a printable 3D model.
Augmented reality (AR) might play a role too—imagine previewing the 3D keepsake on your phone before printing. Personalized items will be more common in gifts, marketing, and even education.
FAQs
How much does it cost to turn a photo into a 3D print?
It depends on size, detail, and whether you DIY or use a service. Small prints start around $10. Complex busts can run $100+.
Do I need a 3D printer at home?
No. Many services let you upload the file, and they print and ship it to you.
Can I 3D print a group photo?
Yes, but it’s more complex. Better results come from individual portraits.
Is it possible to color a 3D print?
Yes. You can paint after printing, or use color 3D printers if available.
What kind of material works best?
PLA filament is popular for beginners. Resin gives better detail for faces.
Conclusion: Turn a Moment Into Something You Can Hold
We live in a world full of fleeting images. But some memories deserve more than a scroll—they deserve to be touched, felt, and cherished. Turning a 2D picture to 3D print lets you do just that. Whether it’s a glowing lithophane of a lost loved one or a mini sculpture of your child’s first birthday, these keepsakes add a tangible layer to our most precious moments.
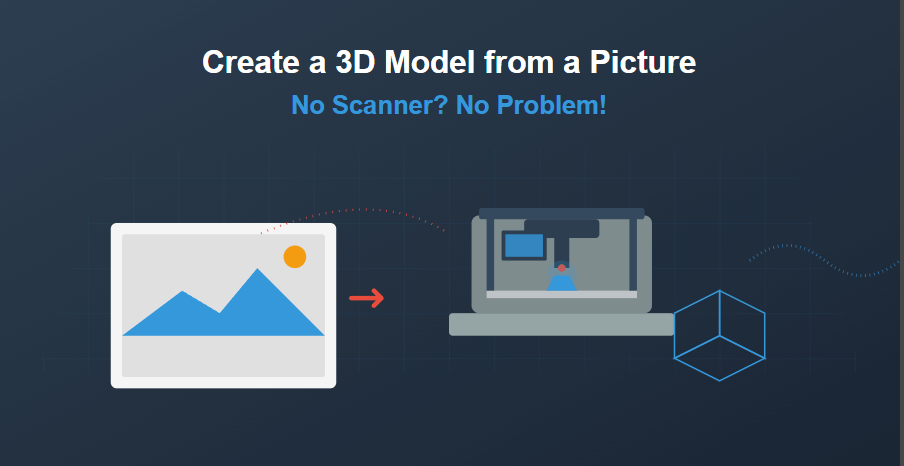
Create a 3D Model from a Picture – No Scanner No Problem
Creating a 3D model from a picture without a scanner might seem like a daunting task, but with the right tools and techniques, it's entirely achievable. Whether you're a hobbyist, an artist, or a small business owner, transforming 2D images into 3D models can open up a world of possibilities. In this guide, we'll explore various methods to create a 3D model from a picture, discuss the best software options, and provide tips to ensure your models are accurate and detailed.
Understanding the Basics of 3D Modeling from Pictures
Before diving into the methods, it's essential to understand the fundamental concepts involved in creating 3D models from pictures.
What is Photogrammetry?
Photogrammetry is the process of extracting 3D information from photographs. By taking multiple pictures of an object from different angles, specialized software can reconstruct the object's 3D shape. This technique is widely used in various fields, including archaeology, architecture, and gaming.
Importance of Image Quality
The quality of your pictures significantly affects the final 3D model. Ensure that your images are:
High-resolution
Well-lit
Taken from multiple angles
Free from motion blur
Consistent lighting and background can also help the software accurately reconstruct the 3D model.
Methods to Create a 3D Model from a Picture
There are several approaches to creating 3D models from pictures, each with its own set of tools and techniques.
1. Using Photogrammetry Software
Photogrammetry software automates the process of creating 3D models from multiple photographs. Some popular options include:
Meshroom
Meshroom is a free, open-source photogrammetry software that uses the AliceVision framework. It's user-friendly and suitable for beginners. Simply import your images, and Meshroom will process them to create a 3D model.
Regard3D
Regard3D is another open-source option that provides a graphical user interface for Structure-from-Motion (SfM) and Multi-View Stereo (MVS) processes. It's compatible with Windows, Linux, and macOS.
VisualSFM
VisualSFM is a GUI application for 3D reconstruction using SfM. It's known for its speed and efficiency, making it suitable for larger datasets.
2. Manual Modeling with Reference Images
If you have only one or two images, manual modeling might be the way to go. This method involves using 3D modeling software to recreate the object by referencing the images.
Blender
Blender is a free and open-source 3D modeling software that offers a wide range of tools for modeling, sculpting, and texturing. You can import your reference images and use them as a guide to model the object manually.
SketchUp
SketchUp is known for its ease of use and is ideal for architectural and product design. You can import images and use them as a reference to build your 3D model.
3. Using AI-Based Tools
Advancements in AI have led to the development of tools that can generate 3D models from a single image. While these models may not be as accurate as those created using photogrammetry, they can be useful for quick prototyping.
DIB-R
DIB-R (Differentiable Interpolation-Based Renderer) is a neural network that can generate 3D models from a single image. It's primarily used in research settings and requires technical expertise to implement.
Deep Dream Generator
While not specifically designed for 3D modeling, tools like Deep Dream Generator can create depth maps from images, which can then be used to generate basic 3D models.
Step-by-Step Guide: Creating a 3D Model Using Meshroom
Let's walk through the process of creating a 3D model from pictures using Meshroom.
Step 1: Capture Your Images
Take multiple high-quality photographs of the object from various angles, ensuring that each part of the object is visible in at least three images.
Step 2: Import Images into Meshroom
Open Meshroom and drag your images into the workspace. The software will automatically create a node-based workflow.
Step 3: Start the Reconstruction Process
Click the "Start" button to begin the reconstruction process. Meshroom will process the images and generate a 3D model. This process may take some time, depending on the number of images and your computer's performance.
Step 4: Export the 3D Model
Once the process is complete, you can export the 3D model in various formats, such as OBJ or PLY, for further editing or 3D printing.
Tips for Improving 3D Model Accuracy
Use a tripod to ensure stability while capturing images.
Avoid reflective or transparent surfaces, as they can confuse the software.
Ensure consistent lighting to minimize shadows and highlights.
Use markers or a textured background to help the software identify reference points.
Applications of 3D Models Created from Pictures
Creating 3D models from pictures has numerous applications across various industries:
Product Design: Quickly prototype and visualize new products.
Architecture: Reconstruct buildings and structures for renovation or preservation.
Gaming: Create realistic assets for video games.
Education: Develop interactive learning materials.
Art and Animation: Bring 2D concepts to life in 3D space.
FAQs
How accurate are 3D models generated from a single image?
They can be reasonably accurate for basic shapes but may lack detail and dimensional accuracy. Multiple images or manual refinement are typically needed for higher precision.
Can I 3D print directly from a photo?
No, you must first convert the photo into a 3D model using software, then prepare the model for printing.
What software is best for turning photos into 3D models?
It depends on the method. Blender is great for manual work, while photogrammetry software like Meshroom or RealityCapture is ideal for scanning. AI platforms are still evolving.
What formats should I export my model in?
STL is the most common for 3D printing. OBJ and 3MF are also widely supported and offer additional features like color and texture support.
Is it legal to 3D print something from someone else's photo?
Only if you have the rights to the photo or it's in the public domain. Always check copyright before using third-party images.
Conclusion: Bring Your Photos to Life
Turning a 2D image into a 3D model is no longer limited to experts. With the right tools and a clear process, anyone, from independent artists to small business owners, can convert a flat image into a functional, printable object. Whether you're building a product prototype or a custom keepsake, the ability to create a 3D model from a picture opens up new creative and commercial possibilities.
Ready to get started? Choose your method, refine your workflow, and invest in the right printer to bring your ideas into the real world.
3D Model from a Picture: What Works in 2025 (And What Doesn’t)
In 2025, transforming a 2D image into a 3D model has become more accessible than ever, thanks to advancements in AI and software tools. Whether you're a hobbyist, artist, or small business owner, understanding the best methods and tools is crucial. This guide delves into what works and what doesn't when creating a 3D model from a picture.
Introduction
Creating a 3D model from a picture is no longer a task reserved for experts. With the rise of user-friendly tools and AI-driven software, even beginners can bring their 2D images to life. For small businesses, this capability can streamline prototyping and product design, especially when paired with the best 3D printer for a small business.
What Works in 2025
AI-Powered Tools
AI has revolutionized the process of converting images into 3D models. Tools like Spline and Meshy AI offer intuitive interfaces where users can upload images and receive 3D models in return. These platforms are ideal for quick concept visualizations and are becoming increasingly popular among designers and developers.
Photogrammetry
Photogrammetry involves capturing multiple images of an object from various angles and using software to stitch them into a 3D model. Software like 3DF Zephyr has made this process more accessible, allowing users to create detailed and accurate models suitable for various applications.
Manual Modeling with Software
For those seeking precision and control, manual modeling remains a viable option. Software like Blender enables users to import reference images and build 3D models from scratch. While this method requires more time and skill, it offers unparalleled customization and detail.
What Doesn’t Work in 2025
Single-Image Conversions
While AI tools have advanced, creating accurate 3D models from a single image remains challenging. Depth perception and hidden details are difficult to infer from one perspective, often resulting in incomplete or distorted models.
Low-Quality Inputs
The quality of the input image significantly affects the output. Images with poor resolution, lighting, or clarity can lead to inaccurate models. Ensuring high-quality, well-lit images is essential for successful conversions.
Overreliance on Automation
While automation simplifies the process, it can also lead to generic or less detailed models. Manual adjustments and refinements are often necessary to achieve the desired level of detail and accuracy.
Best Practices for Creating 3D Models from Pictures
Use Multiple Images
Capturing multiple images from different angles provides more data for the software, resulting in more accurate and detailed models.
Ensure High-Quality Images
Use high-resolution images with good lighting and clear focus. Avoid backgrounds that may confuse the software during the conversion process.
Combine Methods
Utilize a combination of AI tools, photogrammetry, and manual modeling to achieve the best results. Each method has its strengths, and combining them can compensate for individual limitations.
Frequently Asked Questions
Can I create a 3D model from a single picture?
While possible, creating a detailed and accurate 3D model from a single image is challenging and often results in less precise models. Using multiple images is recommended for better results.
What is the best software for converting images to 3D models?
The best software depends on your specific needs. AI tools like Spline are great for quick conversions, while photogrammetry software like 3DF Zephyr offers more detailed models. For manual modeling, Blender is a powerful and free option.
Do I need a powerful computer for 3D modeling?
While high-end computers can speed up the process, many tools are optimized for standard hardware. Cloud-based solutions also offer powerful processing without the need for expensive equipment.
Conclusion
Creating a 3D model from a picture in 2025 is more accessible than ever, thanks to advancements in AI and software tools. By understanding the strengths and limitations of each method, you can choose the best approach for your project. Whether you're a hobbyist or a small business owner, the ability to transform images into 3D models opens up new possibilities for creativity and innovation.
Turning a Hobby into a Hustle: How to Start a Small Business Using a Heat Press Machine
Are you interested in turning your crafting hobby into a thriving business? If you excel at creating and designing beautiful products, being a business owner with a heat press machine could be the perfect next move.
The excitement of creating personalized items is fun, but imagine enjoying that excitement and getting paid for it! In this tutorial, we will observe how to start a small business with a heat press machine, gaining information, practical steps, and personal experience that can guide you towards success.
The Growth of Customized Products
Let us discuss first why customized items are in high demand. Today's consumers desire unique, personalized products that resonate with their individuality.
From customized t-shirts for a family reunion to customized mugs for weddings or custom home decor, a product with a personal touch speaks volumes to consumers. Based on a report by Statista, the worldwide market for personalized gifts is expected to hit more than $31 billion by 2024. This growth in the market indicates the potential for high profits for small businesses with a heat press machine.
Starting Out: What Equipment to Use
Pick Your Heat Press Machine
Your initial step into entrepreneurship is picking a heat press machine. Here are some points to consider:
Heat Press Type: There are several types, including clamshell, swing-away, and cap presses. Clamshell presses are compact and ideal for beginners, while swing-away presses provide more space for larger designs.
Pressure and Size Settings: Your choice should depend on the kinds of items you will be producing. A large heat press is more versatile but may take up more space in your workspace.
Budget: Heat press machine prices vary quite extensively. Budget accordingly, but remember quality will be essential for consistent, professional results.
As a beginner, a model like the Mophorn Heat Press will probably be well-reviewed due to its affordability, stability, and simplicity of operation.
Necessary Accessories
In addition to your heat press machine, you will need:
Heat Transfer Vinyl (HTV): It comes in various colors and finishes, and it is easy to work with.
Sublimation Paper: This is required for dye-sublimation printing if your business handles fabrics that can support sublimation.
Transfer Sheets: These are used for printing images and designs.
Weeding Tools: These tools help in stripping away excess vinyl and allow for cleaner designs.
Protective Items: Teflon sheets or parchment paper shield your press and your items while pressing.
Create a Workspace
Organize a clean, well-lit workspace that is capable of holding your heat press machine and other equipment. Provide proper ventilation, particularly when using heat transfer materials.
Design and Create: The Heart of Your Business
Learn Design Software
Having ideas is one thing; being able to implement them in design is another. Learn about design programs at your level of experience. Some options include:
Canva: Good for beginners, with simple-to-use templates.
Adobe Illustrator: For experienced users who need advanced design options.
Inkscape: A free, vector graphics design program.
Develop Your Product Range
Think about what you want to sell. Expanding beyond t-shirts alone can be a great idea. Here are some product ideas to consider:
Personalized Apparel: T-shirts, hoodies, hats, and bags.
Home Decor: Pillows, wall art, and table covers.
Promotional Products: Mugs, coasters, and tote bags.
Seasonal Products: Personalized products for holidays, weddings, or special events.
Develop and Test Your Products
Start by creating a small production of your goods. This will allow you to test the response of the market and make alterations to your designs based on feedback. You might have a little pop-up shop or neighborhood market stall in order to get hands-on feedback from consumers.
Creating Your Brand
Develop Your Unique Selling Proposition (USP)
This question should prompt you: What differentiates your business? Your USP could be anything, ranging from unique designs to exceptional customer service.
Choosing a Business Name
Choose a name that is easy to remember and appropriate for your brand's values. Ensure it's easy to remember and check if the domain name is available if you plan on creating a website.
Establish an Online Presence
Your online presence matters in this modern day and age. Keep the following in mind:
Website: Create a website that is easy to use where customers can view and purchase your products. Shopify or WooCommerce are great options for e-commerce.
Social Media: Make profiles on social media platforms like Instagram, Facebook, and Pinterest, where pictures rule. Share your design process, finished work, and customer feedback.
Content Marketing: Utilize content marketing to boost your web presence. Have a blog on your website where you share crafting advice, tutorials, or the history of your work. Not only does this engage your audience, but it also boosts your website's search engine ranking.
Marketing Your Business
Find Your Target Audience
Knowing who your target customer is crucial. Are you selling to individuals looking for personalized gifts, local businesses that require imprinted shirts, or event planners? Knowing your audience will dictate your marketing.
Utilize Social Media Advertising
Social networking websites possess wonderful advertising tools that will help you reach more individuals. Create attractive ads that display your products. Applications like Facebook Ads Manager enable you to reach users based on their interests, demographics, and behaviors so that your ads find their potential customers.
Work with Influencers
Collaborating with influencers who represent your brand can increase your audience dramatically. Identify influencers in the small business or crafting niche that have followers who will appreciate your products. Even a shout-out or review from them can drive sales.
Attend Local Markets and Craft Fairs
Taking part in local festivals and craft fairs is a great way to engage with your local community and promote your products. People like to see products firsthand, and this personal contact establishes confidence in your brand.
Pricing Your Products
Keep Your Costs in Mind
In setting the prices for your products, keep all expenses in mind:
Material Costs: Factor in the cost of HTV, sublimation ink, and raw materials.
Labor Costs: Account for your time spent designing and producing the items.
Overhead: Include utility bills, website hosting fees, and marketing expenses.
Research the Market
Check your competitors’ prices to ensure your pricing is competitive. Look for a balance between affordability for your customers and profitability for your business.
Create Attractive Packaging
Your packaging can make a huge difference in a customer's impression of quality. Invest in high-quality packaging that looks professional and improves the customer experience. Unboxing should be an experience!
Managing Your Business
Keep Accurate Records
Track all expenses, sales, and inventory. Consider using software like QuickBooks, Wave, or even a spreadsheet to track your finances correctly. This will allow you to view your cash flow and make sound decisions.
Scale Your Business
As you grow your business, consider whether you will expand your product line or production capacity. You can pursue wholesale opportunities or joint ventures with other small businesses. Automated means for handling repeat tasks, easy-to-operate inventory management systems, and even outsourcing when needed might come into the picture.
Collect Customer Feedback
Don't overlook getting and taking action on customer feedback. It contains important information regarding product quality, customer satisfaction, and improvement areas. Ask for opinions through surveys or follow-up emails, and use the feedback to polish your offerings.
Conclusion: Taking the Leap
Making your hobby craft a business with the help of a heat press machine may seem daunting, but what can be involved can be immensely rewarding. Going from creating personalized products that communicate with consumers to building a brand that is recognized in a marketplace filled with numerous competitors, each step can yield rewarding experiences and profits.
As you begin this thrilling journey, don't forget to be flexible, continue learning, and focus on quality in all that you produce. Your own style and passion will radiate through your products, drawing customers who value the personal touch.
Unlocking Creativity: Top 10 Ways to Use a Heat Press Machine
Do you ever wonder how designers create such lovely designs on shirts, mugs, and bags? The magic behind them is a heat press machine, which allows one to turn their ideas into lovely, durable products.
If you've just purchased a heat press or are considering entering the heat pressing world, you're in for a treat! In this tutorial, we will be revealing the top 10 most innovative uses for a heat press machine, opening up a whole new world of possibilities.
What is a Heat Press Machine?
Let's just take a moment to determine what a heat press machine is before we dive into the creative uses. A heat press is a device that uses pressure and heat to transfer designs onto various surfaces like metals, ceramics, and textiles.
It works by applying a specific amount of heat and pressure for a defined duration of time, which makes the transfer material like heat transfer vinyl (HTV) or sublimation paper adhere to the substrate. Mophorn's heat press machine, for instance, is the perfect amalgamation of simplicity and quality, appealing to hobbyists and small businesses alike.
Why Use a Heat Press Machine?
Using a heat press machine brings numerous benefits:
Professional Quality: Get output that can rival commercial goods.
Versatility: Ideal for a broad variety of materials, from fabrics to ceramics.
Durability: Creates designs that won't fade with washes.
Ease of Use: The procedure is simple, so you can focus on creativity.
With all these advantages, it is easy to see why a heat press machine is an essential tool for crafters. Now, let us consider some ways you can utilize this powerful machine to unleash your creativity!
1. Custom Apparel Design
One of the most popular uses for a heat press machine is creating personalized apparel. If you want to personalize t-shirts for a family gathering, make uniforms for your team, or develop your small business's merchandise, the world is your oyster.
Materials Used: Heat transfer vinyl (HTV), sublimation paper, or printable heat transfer paper.
How-To: Design your graphic using software like Adobe Illustrator or Canva, and print and cut out your graphics. Transfer them to your garment and heat press using your heat press machine.
Custom clothing not only ensures personal expression but also ensures a lucrative opportunity for those who want to start a side business.
2. Unique Home Décor
Your heat press machine may also serve as a home decor. Think of personalized pillows, wall decals, or even personalized curtains.
Materials Used: Pillow covers, canvas, or fabric.
How-To: Choose your designs, print them on the fabric by using the heat press, and incorporate them in your home. A quote printed on a pillow, for instance, can give a cozy ambiance to your home.
This project allows you to create unique, one-of-a-kind products that reflect your personality.
3. Personalized Gifts
Need a special gift for a family member or friend? Custom gifts made using a heat press have a personal element that off-the-shelf products just can't provide.
Materials Used: Mugs, tote bags, coasters.
How-To: Print inspirational quotes or images on sublimation paper or HTV and transfer them onto the object. Think of giving a coffee mug with a special photo or quote.
Personalized gifts are not only kind but also can be personalized to suit various occasions, from holidays to birthdays.
4. Event and Party Supplies
Hosting a big event or party? Your heat press can become your lifesaver by designing customized supplies that will wow your guests!
Materials Used: T-shirts, banners, table covers.
How-To: Design event-specific graphics or slogans—think "Team Bride" t-shirts for a bachelorette party. Using the heat press, transfer these designs onto clothing or decor that is party-themed.
This individualization can set your event apart and provide lasting impressions.
5. Team Sports Apparel
Nothing brings a team together quite like personalized uniforms! Whether the team is a local league team or a school team, a heat press can help you make uniforms that promote team spirit.
Things Used: Jerseys, hats, shorts.
How-To: Place team logos and players' names onto the apparel using a heat press. Personalized jerseys can make a team feel more like family and professional.
Second, you can even create special clothing for parents or sponsors to use in games.
6. Pet Accessories
Your pets shouldn't miss out on customized stuff. Using your heat press, you can create customized pet tops or accessories.
Materials Used: Dog tee shirts, bandanas, collars.
How-To: Create clever or cute designs for pet attire using HTV and your heat press. Imagine crafting a stylish "I’m the Good Boy" t-shirt or a seasonal bandana for your dog!
Tips: Always consider the material of your pet's apparel. Cotton blends work best for comfort, while thicker materials may need more pressure and time.
Custom pet items not only enhance the cuteness of your pets but also make wonderful gift ideas for fellow pet lovers.
7. Kitchen and Household Essentials
Your heat press can even provide a professional appearance to ordinary kitchen and household items. Consider creating customized aprons, oven mitts, or kitchen towels.
Materials Used: Cotton aprons, towels, or heat-resistant materials.
How-To: Make fun and quirky kitchen graphics using your design software. Add a little pressure and heat, and you've got a unique kitchen item that reflects your love of cooking.
Such personalized kitchen products can also make great gifts during weddings or housewarming ceremonies.
8. Seasonal Decor and Holiday Items
Celebrate the holiday season with customized seasonal decorations! Whether Christmas, Halloween, or any special holiday is approaching, your heat press can bring your visions to life.
Materials Used: Ornaments, banners, holiday signs.
How-To: Design holiday graphics or sayings and press them onto ornaments or banners. You may even create customized holiday t-shirts for family gatherings.
These holiday crafts not only enhance the beauty of your home but also establish lasting family traditions.
9. Customized Promotional Products
Entrepreneurs of small businesses can significantly benefit from the versatility of a heat press machine, especially when utilized for promotional products.
Materials Used: Tote bags, caps, notebooks.
How-To: Create branded products that showcase your logo or services. Apply these designs with your heat press, which will help in promotion and brand recognition.
Selling these products can help promote your business at a fraction of the cost of outsourcing promotional products.
10. Customized Office Supplies and Stationery
Finally, use your heat press to personalize your office with customized office supplies and stationery.
Materials Used: Desk mats, folders, or notebooks.
How-To: Use vinyl to create personalized designs or motivational quotes. Putting these on your stationery can inspire creativity and order in your workspace.
This extra personalization not only makes your workspace inviting but also serves as a thoughtful gift for students or colleagues.
Conclusion: Unleashing Your Creativity with a Heat Press
As you can tell, the creative uses for a heat press machine are many and varied. From customized clothing to unique home decor and personalized gifts, this versatile tool can help you tap into your creativity and bring your vision to life. Whether you're a hobbyist looking for a fun project or an entrepreneur about to start a small business, the heat press can be your best-kept secret in crafting.
With projects ranging from sports gear to seasonal decor, every application is an invitation to a new level of creativity. Don't neglect to spend some time learning the ins and outs of your machine and experiment with different materials to truly unleash its potential. By exploring these various applications, not only will you have created beautiful products, but you'll have experienced the pleasure of creating something uniquely yours.
Picture to 3D Printer: Unlock the Magic of 3D Printing from Photos
In today’s digital world, 3D printing is changing the way we create and design. From prototypes to personalized items, this technology has endless possibilities. But what if you could take a simple picture and transform it into a 3D-printed object? Picture to 3D printer technology is making that dream a reality, bringing photographs to life in the most remarkable way.
Imagine capturing a moment, a person, or an object in a photograph and then watching it come to life in three dimensions, ready to be held and admired. It sounds like something out of a science fiction movie, but thanks to recent advancements in 3D printing, this process is now accessible to anyone with a 3D printer and the right tools, even more so if you’re using the best 3D printer for small business to turn ideas into eye-catching designs.
In this blog post, we will delve into the process of converting pictures into 3D models and then printing them, exploring the steps, tools, and potential applications for this fascinating technique. Whether you’re a hobbyist, a small business owner, or just someone curious about how it works, this guide will provide you with everything you need to know about unlocking the magic of 3D printing from photos.
What is "Picture to 3D Printer" Technology?
The concept of "Picture to 3D Printer" refers to the process of converting a 2D image (such as a photograph) into a 3D model that can be printed using a 3D printer. It involves transforming a flat image into a digital 3D representation, which can then be brought into the physical world through a 3D printing process.
This technology utilizes specialized software that analyzes the details in the image, creating a 3D object based on its features. These 3D objects can then be printed using materials such as plastic, resin, or metal, depending on the type of 3D printer used.
How Does the Process Work?
Turning a picture into a 3D model involves several steps. Let’s break it down:
1. Choosing the Right Image
The first step in this process is selecting the right photo. High-quality, well-lit images with clear details are ideal for creating 3D models. For objects or people, it helps to have the photo taken from different angles. A single flat image can work, but multiple angles of the subject will provide more depth and texture to the final model.
2. Using 3D Modeling Software
Once you have the image, it’s time to convert it into a 3D model. There are various 3D modeling programs available, both free and paid, that can help with this task. Some popular software tools include:
Meshroom: A free open-source program that uses photogrammetry to convert images into 3D models.
Blender: Known for its 3D modeling capabilities, Blender is often used for more detailed and custom designs.
Autodesk ReCap: A powerful tool for turning images into 3D models, handy for professional applications.
The software works by creating a mesh, or a framework, from the image. It analyzes the photo’s details, textures, and shapes to build a 3D representation of the object or scene.
3. Refining the Model
After the initial model is generated, it often needs refinement. This can involve smoothing out rough areas, correcting any distortions, and adding textures or colors to make the model more lifelike. Many 3D designers take this opportunity to make adjustments and enhancements to the model, ensuring it meets their expectations.
4. Preparing for Printing
Once the model is ready, it needs to be converted into a file format compatible with 3D printers, typically STL or OBJ. These file formats contain the necessary data for the printer to accurately reproduce the model.
From there, the file is uploaded to the 3D printer’s software, where users can adjust settings like material type, print speed, and resolution.
5. 3D Printing the Model
Now, it’s time for the magic to happen. The 3D printer reads the file and begins printing layer by layer, using materials like plastic filament, resin, or even metal, depending on the printer. The printer follows the model’s dimensions to create a physical object from the digital file.
Tools and Software You’ll Need
To make the process as smooth as possible, it is essential to have the right tools. Here are some of the best tools and software for converting pictures to 3D models:
1. 3D Scanners
While not strictly necessary, a 3D scanner can help capture the 3D shape of an object directly, bypassing the need for multiple images. These devices use lasers or cameras to scan an object and convert it into a digital 3D model, which can then be printed.
2. Photogrammetry Software
Photogrammetry is a technique that enables users to create a 3D model from multiple photos. This software works by analyzing the various perspectives in the images and stitching them together to create a 3D object. Some popular photogrammetry tools include:
Agisoft Metashape
RealityCapture
Zephyr 3D
3. 3D Modeling Software
As mentioned earlier, tools such as Blender, Autodesk Fusion 360, and Tinkercad are essential for refining the model after it has been created. These tools allow you to add, adjust, and enhance your 3D model before sending it to the printer.
4. 3D Printers
Once your model is ready, you need a 3D printer to bring it to life. Some of the best 3D printers for personal use include:
Creality Ender 3
Anycubic Photon Mono X
Prusa i3 MK3S
These printers offer a range of features, including speed and print quality, catering to different levels of experience and expertise.
Practical Applications of Picture to 3D Printer Technology
Turning pictures into 3D models and printing them isn’t just for fun. There are many practical applications for this technology:
1. Personalized Gifts
Turning a photo of a loved one into a 3D-printed figurine makes for an incredibly thoughtful gift. Whether it’s a wedding cake topper, a model of a pet, or a sculpture of a family, 3D printing brings personal memories to life in a way that traditional gifts can’t.
2. Prototyping and Product Design
For entrepreneurs and designers, picture to 3D printer technology offers a fast and cost-effective way to create prototypes. Instead of relying on expensive and time-consuming methods, you can quickly turn your design ideas into 3D models and test them out in the physical world.
3. Educational Projects
Teachers and students can use this technology to bring learning materials to life. From historical artifacts to scientific models, the ability to 3D print real-life representations of concepts can enhance understanding and engagement.
4. Restoration and Preservation
3D printing is often used in the preservation of artifacts, where old, delicate objects can be scanned and replicated for study or display. Museums use this technology to make high-quality replicas of ancient sculptures or fossils that are too fragile to handle.
5. Gaming and Animation
For the entertainment industry, 3D models generated from pictures can be used for game development or movie production. Whether it’s turning a character sketch into a 3D model for a game or creating a visual representation of a scene from a script, the possibilities are endless.
Frequently Asked Questions (FAQs)
Can I convert any photo into a 3D print?
Not all photos are suitable for 3D printing. Photos with clear, detailed subjects work best. For objects, multiple angles of the same subject will provide more depth for the model.
What is the best software for converting pictures into 3D models?
Popular software options include Blender for advanced 3D modeling, Meshroom for photogrammetry, and Autodesk ReCap for professional-grade conversions.
Can 3D printing from pictures be done at home?
Yes! With the right software and a 3D printer, you can turn pictures into 3D prints at home. Just make sure you have a high-quality image and the necessary tools to create and refine the 3D model.
Conclusion
The world of 3D printing has evolved significantly over the past few years, and the ability to turn a simple picture into a tangible 3D object is a perfect example of how innovative this technology has become. Whether for personalized gifts, prototyping, or even educational purposes, the process of converting pictures to 3D models opens up a world of possibilities.
If you’re ready to try it for yourself, gather your tools, select your images, and start creating! It’s time to bring your photos to life and unlock the magic of 3D printing from pictures.