Create Stunning Keepsakes by Turning a 2D Picture into a 3D Print
A Simple Photo Can Do More Than You Think
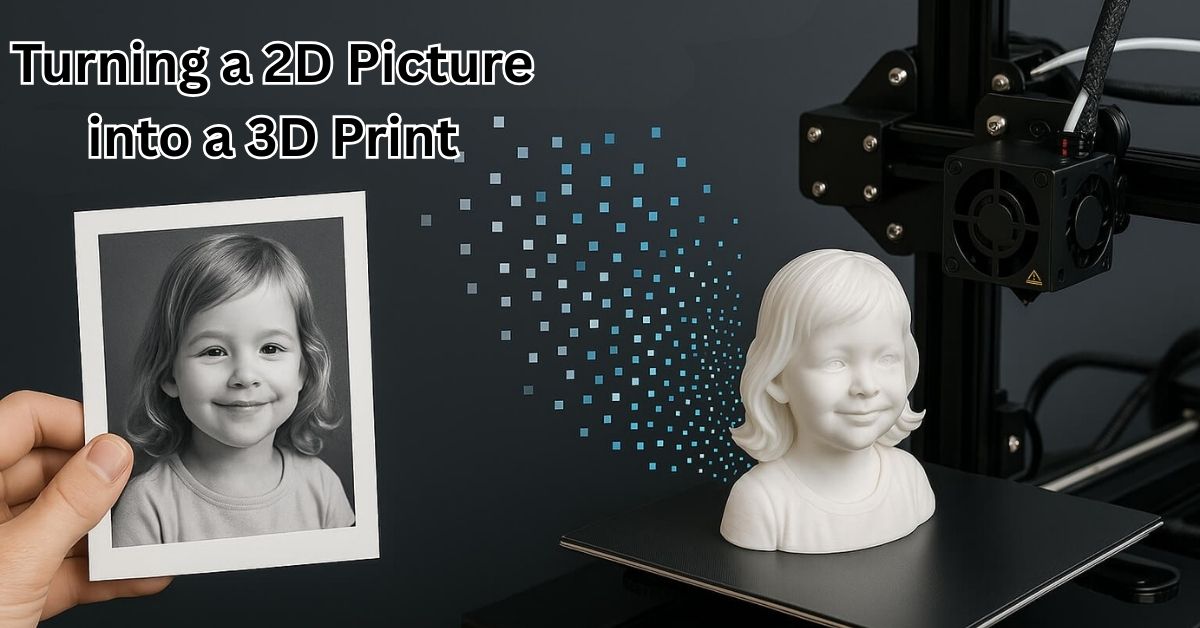
Have you ever looked at an old photo and felt a wave of emotion wash over you? That memory, frozen in time, holds so much value. Now imagine holding that memory in your hands—not as a flat picture, but as a beautiful 3D keepsake. Thanks to evolving technology, turning a 2D picture into a 3D print is possible and surprisingly simple. This blog will guide you through the process, uncover fresh ideas, and show how this transformation can help preserve the most meaningful parts of your life. If you're exploring this for commercial use, choosing the best 3D printer for a small business can help you scale your creativity into a profitable venture.
From Pixels to Sculptures: How the Magic Happens
Turning a flat image into a 3D object might sound like a job for an artist. In reality, it’s a mix of smart software and precise machines. Here’s a breakdown:
Step 1: Choose the Right Photo
Not all photos work equally well. Clear images with good lighting and sharp contrast make better 3D models. For portraits, a front-facing headshot gives the best results.
Step 2: Convert with 3D Modeling Software
Several software options help convert 2D images into 3D models:
Smoothie-3D: Great for beginners. Free and web-based.
Lithophane Makers: These turn your image into a 3D light panel.
Blender: Advanced tool for detailed work.
You trace or map your image onto a 3D surface and adjust depth manually or let AI assist.
Step 3: Prepare for Printing
Once you have the model, slice it using tools like Cura or PrusaSlicer. Adjust resolution and supports depending on your printer type—FDM or resin.
Step 4: Print and Finish
Print your model using filament or resin. Post-processing might include sanding, priming, or painting, depending on your taste.
Real-Life Stories: Memories Brought to Life
Sarah’s Grandfather
Sarah lost her grandfather a year ago. She had one cherished photo of them fishing. Using a 3D modeling service, she turned the photo into a lithophane. When she puts it near her desk lamp, the image softly glows—a beautiful reminder of a quiet day on the lake.
Mark’s Wedding Gift
Mark wanted a unique anniversary gift. He turned a wedding photo into a miniature sculpture. His wife was speechless when she unwrapped it—a frozen moment now standing on their mantel.
These stories show how turning a 2D picture to 3D print can touch lives.
Why It’s More Than Just a Print
There’s something magical about holding a memory. Here’s why these keepsakes matter:
Emotional Connection
A 3D object feels more real than a flat photo. It invites touch. It adds depth—literally and emotionally.
Timeless Gifts
Unlike common photo frames, a custom 3D print is unexpected and personal. It becomes a conversation piece.
Digital to Physical Transition
In today’s digital age, so many moments stay trapped in phones. 3D printing brings them to life.
Choosing the Right Method for You
Not all projects are equal. Here’s a breakdown of methods and their uses:
Method | Best For | Tools Needed | Skill Level |
Lithophane | Glowing light panels | Lithophane generators | Beginner |
Relief Sculptures | Faces, logos, art pieces | Blender, ZBrush | Intermediate |
Full 3D Models | Busts, figures, small statues | Multiple software tools | Advanced |
Lithophane for Beginners
You upload a photo, adjust contrast and brightness, and print. They work well as night lights or sun catchers.
Sculpted Relief for Portraits
Relief gives a low-profile, raised effect like what you see on coins or medals.
Full Models for Serious Projects
Want a statue of your pet or a 3D family photo? These take more time but are incredibly rewarding.
Tools and Software You’ll Need
The market offers both free and premium tools. Here are some of the most reliable:
Smoothie-3D: Great for beginners.
Blender: Free, open-source. Has a learning curve but highly customizable.
Photoshop + Depth Map Tools: Good for grayscale reliefs.
PrusaSlicer / Cura: Essential for slicing models for print.
For those not tech-savvy, online services like ItsLitho, Shapify, or Zazzy can handle it for you.
Tips for Best Results
Choose high-resolution photos.
Adjust contrast before importing.
Use grayscale versions for lithophanes.
Test print a small version before the final.
Use a resin printer for detailed face models.
A Look Into the Future
Technology is improving fast. AI is already helping convert images into depth maps. Soon, you might upload a photo and instantly receive a printable 3D model.
Augmented reality (AR) might play a role too—imagine previewing the 3D keepsake on your phone before printing. Personalized items will be more common in gifts, marketing, and even education.
FAQs
How much does it cost to turn a photo into a 3D print?
It depends on size, detail, and whether you DIY or use a service. Small prints start around $10. Complex busts can run $100+.
Do I need a 3D printer at home?
No. Many services let you upload the file, and they print and ship it to you.
Can I 3D print a group photo?
Yes, but it’s more complex. Better results come from individual portraits.
Is it possible to color a 3D print?
Yes. You can paint after printing, or use color 3D printers if available.
What kind of material works best?
PLA filament is popular for beginners. Resin gives better detail for faces.
Conclusion: Turn a Moment Into Something You Can Hold
We live in a world full of fleeting images. But some memories deserve more than a scroll—they deserve to be touched, felt, and cherished. Turning a 2D picture to 3D print lets you do just that. Whether it’s a glowing lithophane of a lost loved one or a mini sculpture of your child’s first birthday, these keepsakes add a tangible layer to our most precious moments.